If you’re aiming for vibrant, durable custom apparel, UV DTF transfers can be a game changer, delivering sharp, color-true images on a wide range of fabrics while keeping production efficient enough for growing brands. This approach blends the flexibility of Direct-To-Film with the instant cure of UV inks, aligning with the DTF transfer process and excelling in DTF printing on textiles, while offering repeatable results that scale from solo projects to small production runs. Whether you’re printing bold logos for a team, designing boutique tees, or making personalized gifts, mastering this technique ensures consistent, high-impact results across different garment types and fabrics. From design to final press, a reliable heat-press workflow—including heat-press settings for DTF UV transfers—helps maximize durability and color accuracy, reduces misprints, and supports efficient curing across varying batch sizes. You’ll also learn how to apply DTF transfers correctly, troubleshoot common issues, and scale production for dozens or hundreds of items, with practical tips for workflow documentation and quality control.
Beyond the exact term, think of this as a UV-curable, film-based textile transfer that leverages rapid curing and strong adhesion for durable graphics on cotton, blends, and even some synthetics. In practice, designers describe it as a UV-light-activated transfer or a digital textile transfer technique that remains compatible with standard DTF workflows. The focus is on preserving color accuracy, achieving clean edges on dark fabrics, and ensuring a reliable bond through proper substrate prep and curing. Compared with traditional heat transfer methods, this approach often delivers brighter images, crisper detail, and shorter production cycles—concepts buyers and brands often seek in on-demand printing.
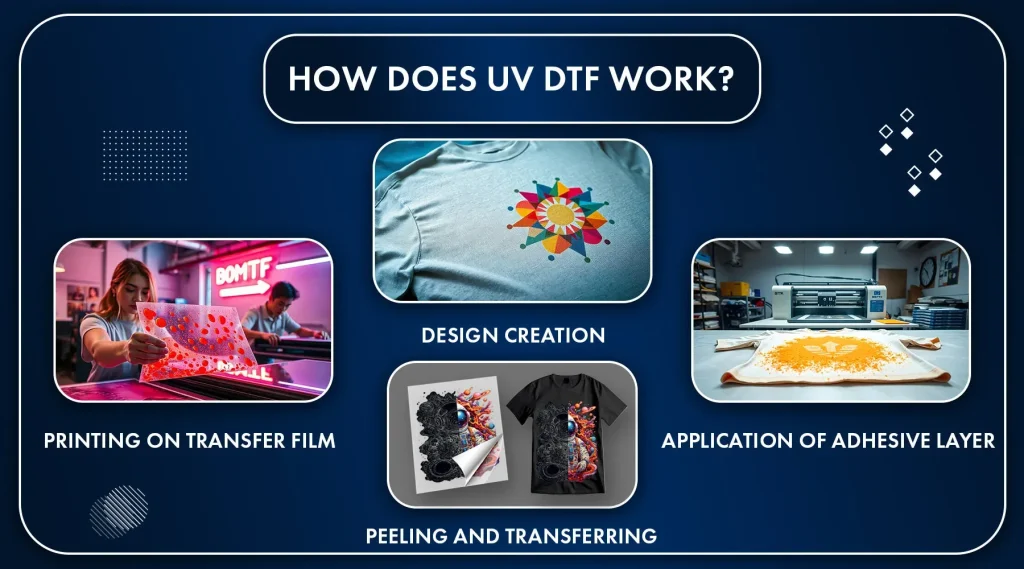
Understanding UV DTF Transfers: What They Are and How They Work
UV DTF transfers fuse Direct-To-Film design with UV-curable inks that cure instantly under ultraviolet light. This combination preserves the familiar DTF transfer process—design, print on film with a white underbase where needed, dust with hot-melt adhesive powder, cure, and press onto the garment—while delivering the speed of UV curing. By leveraging a UV variant, you can reduce smear risks and accelerate setup, especially for fast-turnaround orders.
Because these transfers firmly bond to cotton, blends, and even some synthetics, they enable sharp images with bright color on a wide fabric range. Understanding the DTF transfer process helps ensure consistency across dozens or hundreds of transfers, from initial design to final press, and reduces reprints.
Choosing the Right Materials for DTF and UV Curing
Selecting the right materials means choosing a UV-capable printer or a DTF system that supports UV-curable inks, a compatible DTF film, and a reliable hot-melt adhesive powder. The film, white underbase where needed, and adhesive powder must work together for a clean transfer on textiles. Also consider the curing light or UV unit and a heat press capable of stable, even temperatures to maintain color and adhesion.
Quality starts with consistent inputs. Using a predictable resin or powder, a properly tuned UV curing step, and a heat press with even platen temperature helps ensure that the final results hold up to washing. This is where the DTF printing on textiles process meets reliability, letting you reproduce the same look across runs.
Heat-Press Settings for DTF UV Transfers: Achieving Consistent Bonding
Heat-press settings for DTF UV transfers typically start around 305-320°F (150-160°C) for 12-20 seconds with medium pressure on cotton blends. If you’re applying UV inks, a brief additional cure may be recommended by your ink system before peeling or handling. Remember that different fabrics (polyester, blends) may need adjustments to avoid scorching or dye migration.
Always test on a scrap garment before large runs, and use a silicone or teflon sheet to promote even heat. Calibrate your press to eliminate hot spots, and consider a short post-press step if your substrate requires extra bonding. These steps help you lock in details and color without puckering.
Color Management and Design Tips for UV DTF Transfers
Color management for UV DTF transfers starts with a calibrated workflow and accurate proofing. Embed ICC profiles and soft-proof designs to compare on-screen with a calibrated print, and ensure your underbase strategy preserves color brightness on dark fabrics. The DTF transfer process benefits from a solid color plan that accounts for substrate variations.
Design decisions matter: vibrant reds, blues, and yellows should stay within the printer’s color gamut, with black outlines to retain crisp edges. Plan for color shifts after pressing or laundering and test edge softness on a sample before full production. This reduces reprints and preserves a brand’s color identity on textiles.
Step-by-Step Application: How to Apply DTF Transfers
How to apply DTF transfers starts with a clean garment and a quick 5-10 second pre-press to release moisture. Position the transfer on the garment using alignment marks, then secure the film with heat-resistant tape along the edges. Place the cover sheet to protect the image while heat is applied.
Next, set the press to the starting temperature and time (for cotton blends, roughly 315°F for 15 seconds with medium pressure). If your system uses UV inks, follow the ink maker’s pre- or post-press steps. After pressing, try a hot peel or cold peel depending on which yields crisper edges for your setup, then allow the garment to cool completely before handling.
Troubleshooting, Care, and Longevity of UV DTF Transfers
Troubleshooting UV DTF transfers means diagnosing issues like premature peeling, cracking, dull colors, or white underbase visibility. Check temperature, dwell time, and pressure, confirm powder curing, and ensure you’re pressing on a flat, clean surface to avoid edge lift.
For durability and care, instruct customers to wash inside-out in cold or warm water and avoid high-heat tumble drying. A gentle cycle helps preserve images, and if edges start to lift, revisit your heat-press settings in future runs. Proper care extends the life of UV DTF transfers and keeps colors bright across many washes.
Frequently Asked Questions
What are UV DTF transfers and how do they work in the DTF transfer process?
UV DTF transfers use UV-curable inks that cure instantly under ultraviolet light. In the DTF transfer process, you print on a film, apply a hot-melt adhesive powder, cure, and then transfer to fabric with a heat press. This setup delivers sharp, durable images on cotton, blends, and select synthetics with reduced smudging and faster production.
How does DTF printing on textiles change when using UV-curable inks?
DTF printing on textiles with UV inks benefits from instant curing, which minimizes smear and speeds up production. You still need a solid white underbase for dark fabrics, careful color management (embed ICC profiles), and a consistent design-to-press workflow to maintain color accuracy across textiles.
What are the recommended heat-press settings for DTF UV transfers?
Common starting points for heat-pressing DTF UV transfers are around 315°F (157°C) for 15 seconds with medium pressure on cotton blends. Other configurations include 305–320°F (150–160°C) for 12–20 seconds. For polyester blends, adjust temperature or time, and always test on a scrap fabric. Use a silicone or teflon sheet and follow your ink system’s UV cure guidance.
How do you apply DTF transfers to fabrics using UV inks, and what should I watch for?
To apply UV DTF transfers: pre-press the garment 5–10 seconds, position the transfer, secure with heat-resistant tape, apply a cover sheet, and press at the recommended temperature/time with medium pressure. Some inks benefit from a brief extra cure before pressing, and a post-press can help on certain fabrics. Ensure a strong white underbase on dark fabrics and test on a scrap before full runs.
What common issues occur with UV DTF transfers and how can I troubleshoot them?
Common issues include premature peeling, cracking, faded colors, white underbase showing, and powder adhesion problems. Troubleshoot by verifying temperature, dwell time, and pressure; confirm the adhesive powder was properly cured; ensure an even pressing surface; check color management and underbase strategy; and run controlled tests on similar fabrics.
How should I care for garments with UV DTF transfers to maximize durability?
Care instructions should emphasize washing inside out in cold or warm water, avoiding high-heat tumble drying, and using a gentle cycle. If edge lifting occurs, reassess heat-press settings (temperature, time, pressure) for future runs. Proper curing and pressing will help UV DTF transfers endure repeated wear and laundering.
| Aspect | Key Points | Practical Tips |
|---|---|---|
| UV DTF concept and benefits | UV-curable inks cure instantly under UV light, reducing smudging and speeding production while maintaining brightness. Follows the familiar DTF workflow: design → print on film (with white underbase where needed) → apply adhesive powder → cure → transfer with heat press. | Integrate UV cure early in the workflow; test on dark fabrics; ensure your ink system supports UV curing; plan color management and curing times. |
| Process fundamentals | DTF basics are straightforward but rely on a consistent design-to-press cycle: design, print (with white underbase on dark fabrics), powder, cure, press. For UV DTF, curing inks early can reduce smear while preserving the core steps. | Maintain a consistent workflow; prepare substrates properly; embed ICC profiles; soft-proof your colors; test with a sample print before mass production. |
| Materials and equipment matter | A quality UV-printer or DTF setup with UV-curable inks, a suitable DTF film, white underbase (or effective color separation), reliable hot-melt adhesive powder, and a heat press with stable temperature control are essential. A good curing light also matters. | Calibrate the printer and curing system; use consistent resin/adhesive powder; ensure even heat distribution; regularly verify platen temperature and surface flatness. |
| Color, fabric, and garment preparation | Cotton and cotton blends respond well; polyester blends may need temp/pressure adjustments. Pre-press to remove moisture and fibers. For UV DTF, use even, medium-to-light pressure to prevent image crushing. | Pre-press 5–10 seconds; test on swatches; confirm adhesion and color on similar fabrics before full runs. |
| Temperature, time, and pressure guidelines | Starting point for cotton-based fabrics: around 305–320°F (150–160°C) for 12–20 seconds with medium pressure. If using UV inks, apply the recommended UV cure step before pressing. Polyester or blends may require higher temps or shorter dwell times. | Use a silicone or teflon sheet; run controlled tests to dial in exact numbers for your setup; avoid scorching or dye migration. |
| Color management and design tips for UV DTF transfers | Aim for color accuracy and brightness, especially on dark fabrics. Build an adequate white underbase for non-white fabrics. Ensure the printer’s color gamut can reproduce reds, blues, and yellows; consider black for crisp edges. Soft-proof and test against calibrated references. | Embed ICC profiles; soft-proof with sample prints; test edge softness; plan for color shifts after pressing or laundering. |
| Applying DTF transfers: practical, step-by-step guidance | Follow a repeatable workflow: clean garment, pre-press 5–10 seconds, position transfer with alignment marks, secure with heat-resistant tape, cover with sheet, set heat press to starting temp/time, consider UV-specific steps, peel method after pressing, optional post-press, and cool-down. | Secure alignment with tape; use alignment marks; test hot vs cold peels to determine edge crispness; follow ink-system guidelines for pre-/post-press steps. |
| Troubleshooting common issues | Common problems include premature peeling, cracking/flaking, faded colors, white underbase showing, or powder not transferring. | Check temperature, dwell time, and pressure; ensure proper curing of powder; use a flat pressing surface; adjust cure and press parameters as needed. |
| Care, durability, and laundering guidance | UV DTF transfers can be very durable when properly applied. Wash inside out in cold or warm water; gentle cycle; avoid high-heat tumble drying. If edge lifting occurs, re-evaluate press settings for future runs. | Provide laundering guidelines; re-press if needed; ensure proper curing and pressing conditions for longevity. |
| A few final tips for consistent results | Test prints on fabrics similar to the final product; standardize temperature, pressure, and time; document the workflow (ink type, powder, curing method, pressing conditions); invest in a quality heat press and keep a clean, calibrated process. | Keep a running record of settings and outcomes; perform regular equipment calibration; maintain a clean environment to protect adhesion. |
Summary
UV DTF transfers offer a powerful path for vibrant, durable apparel customization by marrying the Direct-To-Film workflow with instant UV curing. This approach streamlines design-to-press workflows, delivering bright, long-lasting prints on cotton, blends, and select synthetics. By paying attention to design integrity, color management, substrate preparation, precise heat-press settings, and proactive troubleshooting, you can achieve consistent, scalable results across many transfers. Whether you’re producing team logos, boutique graphics, or personalized gifts, adopting these best practices will help you reach repeatable perfection and keep customers coming back for more.